How To Prevent Sticky Strings on Erhu
August 16, 2017How to Moisturize Your Dry Erhu Snakeskin
January 3, 2018Basic Erhu Setup
Having your Erhu set up properly can make a world of difference in how it sounds. Sometimes, things that are obvious to experienced players may not be as clear to beginners. So, this blog post will cover the basic Erhu setup. Since all of our Erhus come set up properly, this guide is primarily aimed at those who have purchased Erhus from eBay, Craigslist, or other sources where proper setup is not guaranteed.
We use the word “basic” in the title because there are many intricate details and nuances to each aspect of Erhu setup that we could delve into for days. However, once you have the basic setup down, you’ve already conquered half the battle.
Here are some of the key things you need to pay attention to:
1) Strings
The first thing to check is whether the strings are in order. Sometimes, strings may loosen during shipping, so you may need to tighten them by twining them back.
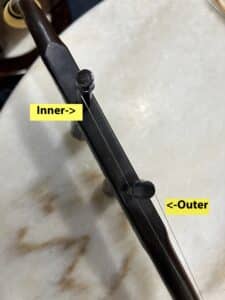
There are two strings: an inner string and an outer string. The inner string is the one closer to you, and the outer string is the one further away.
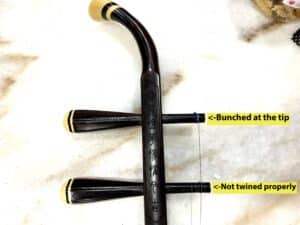
The strings should be twined or bunched at the tip of the pegs.
The inner strings should be looped in an anticlockwise direction, and the outer string should be looped in a clockwise direction.
The strings extend all the way to the bottom of the Erhu, where there are two pins for you to hook the ends of the strings to. Make sure that the strings are not crossed, as this will produce an unpleasant “cackling” sound.
2) Qianjin
There is a roll of string called the Qianjin that holds the two Erhu strings together. Many beginners mistake it for a ribbon and cut it with glee upon receiving their Erhu. This glee quickly turns to sorrow when they realize that the Erhu cannot function without the Qianjin and that the material is difficult to find at their local stationery shop.
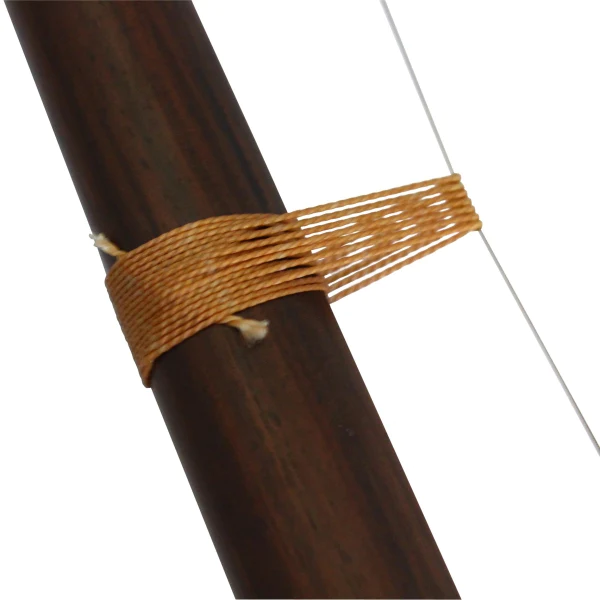
If you accidentally cut it or if it has unravelled by itself, click here to buy a roll of qianjin string from us.
Click here to watch a video on how to tie the Qianjin string
Click here to watch another video on measuring the correct position of the Qianjin string
3) Bridge
Once the strings and Qianjin are in place, you can slide in the bridge.
Gently pull up the strings and slide in the Erhu bridge carefully to avoid damaging the scales.
The bridge should be positioned in the center of the resonator.
4) Damper
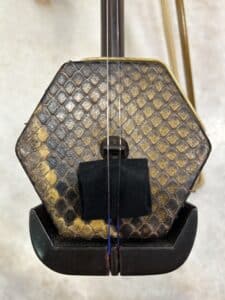
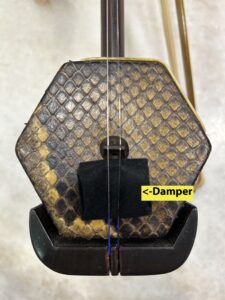
After placing the bridge, you can place the damper underneath it. The damper can be either a piece of cloth or a block of sponge. Personally, I prefer felt cloth.
The reason I put the bridge in before the damper is to ensure that the damper is not folded too thick. If it is too thick, it will be difficult to slide under the strings.
Click here to watch a more detailed video on dampers
5) Bow
Just like a violin bow, the Erhu bow needs to be rosined before playing. If it’s a completely new bow, you’ll need to rosin it more vigorously for the first few times. Make sure to rosin both sides of the bow, as both sides are used to play the inner and outer strings.
You don’t need to remove the bow from the strings to rosin it. However, if you find it easier to do so, unscrew the end pin of the Erhu bow and detach the frog from the bamboo. Once the frog is detached, slide it out between the strings. Reattach the bow in the same way.
6) Tune
The final step is tuning!
The inner string is tuned to D, and the outer string is tuned to A. When tuning, turn the pegs inwards to prevent them from slipping out.
And there you have it – a basic Erhu setup guide for those who have purchased Erhus from sources that don’t provide proper setup
Here’s a video explanation of the Basic Erhu Setup:
But seriously, the only place you should buy an erhu online is from Eason Music.
Click here for our online Erhu store.

